Note This is specifically for Omeka/Neatline 1.x. If you are using Omeka/Neatline 2.x, you can upload your maps to Geoserver with Option 2 below. Follow Editing Record Imagery for working with the WMS layers.
[Cross-posted with dclure.org and scholarslab.org]
This is part 3 of a 3-post tutorial that walks through process of georeferencing a historical map and using it in GeoServer and Neatline.
In part 1 of this series, we used ArcMap to convert a static image into a georeferenced .tiff file. In part 2, we post-processed the file with gdal to remove the black borders around the image. In this article, we’ll load the .tiff file into GeoServer and import the final web map service into a Neatline exhibit.
Generating the web map service on GeoServer
There are two ways to upload the .tiff file to GeoServer – the entire process can be performed through the Omeka interface using the Neatline Maps plugin, or the file can be uploaded directly onto the machine running GeoServer and the service created by way of the GeoServer administrative interface.
The first option is easier, but there’s a fundamental restriction that makes it unworkable in certain situations – since Neatline Maps has to upload the .tif file through Omeka before it can create the map service via the GeoServer API, it’s impossible to upload files through Neatline Maps that are larger than the file upload limit set by the upload_max_filesize and post_max_size settings in the php.ini file on your server.
Depending on the hosting environment, these values can be set to anywhere from 2-20 megabytes by default. If you have access to the php.ini file, you can bump up the limit, but beyond a certain point it probably makes more sense just to upload the file directly to the server running GeoServer and create the web services through GeoServer administrative interface. Since high-resolution .tiff files can easily weight in a hundreds of megabytes or even gigabytes, this is often a more controlled and reliable approach, especially in cases where you’re working with multiple files at once.
Regardless of how the file is uploaded, the final process of importing the map service into Omeka and Neatline works the same way.
Option 1: Upload through Neatline Maps
If your file is small enough to be uploaded through Omeka, the Neatline Maps plugin provides plug-and-play connectivity with GeoServer:
-
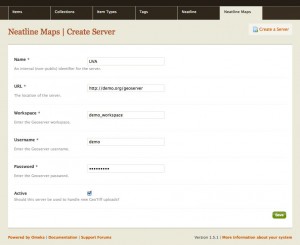
With Neatline Maps installed, click on the “Neatline Maps” tab in the top toolbar of the Omeka administrative interface and click on “Create Server.” Fill in the URL, Username, and Password for your GeoServer. In the Name section, enter a plaintext identifier for the server (used for content management in Omeka) and use the Workspace field to specify the workspace on the GeoServer installation that will house the new stores and layers. Click “Save” to create the server record. (Note: If you want to upload files to more than one installation of GeoServer, you can create as many server records as you want. At any given point, though, only one of the record can be marked as the “Active” server – this the server that the plugin will use to handle new .tif uploads).
-
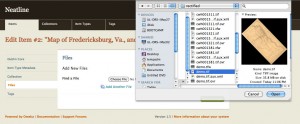
Create an item to associate the web map service with (or edit an existing item). In the Item add/edit form, click on the “Files” tab, click on “Choose File,” and select the .tiff file as you would for a regular file upload. When you save the item, Neatline Maps will automatically detect that you’re trying to upload a georeferenced .tif file and create a corresponding web map service by way of the GeoServer API.
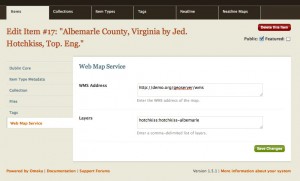
Once you’ve saved the file, if you go back into the Item edit form and click on the “Web Map Service” tab, you’ll notice that “WMS Address” and “Layers” fields have been automatically updated to point to the new web map service. On the show page for the item, the map will be displayed in a small, interactive widget below the default metadata fields.
Option 2: Upload directly to GeoServer
-
First, upload the file to the server running GeoServer with
scpor another file transfer protocol. It’s usually a good idea to get the file out of the/tmpdirectory, but it doesn’t matter beyond that – GeoServer can read the entire file system. We’ve gotten into the habit of putting the source .tiff files in/var/geotiff. -
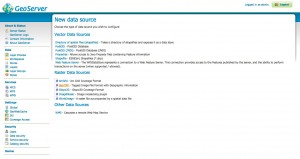
In the GeoServer administrative interface, click on “Stores” in the left column and then click “Add new Store.” On the next screen, click GeoTIFF under the “Raster Data Sources” heading.
-
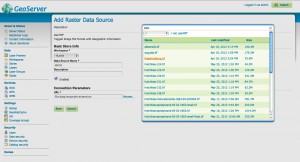
Select a workspace for the store and enter a name. Under “Connection Parameters,” click the “Browse..” link, and use the pop-up window to navigate to the file. Click “Save” to create the store.
-
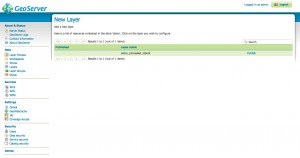
Next, we have to publish the store as a public-facing layer. On the next screen, click the “Publish” link.
-
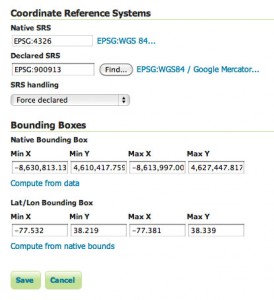
Now, the tricky part. We have to manually tell GeoServer to deliver the layer using a coordinate projection system that Neatline can use to layer the map on top of the real-geography base layers in OpenLayers. Scroll down to the “Coordinate Reference Systems” heading and enter
EPSG:900913into the “Declared SRS” field. Under “SRS handling,” select “Force declared.” Under the “Bounding Boxes” heading, click both the “Compute from data” and “Compute from native bound” links.
Now, with the layer created, we can associate the new web map service with an item in your Omeka collection by manually filling in the two fields in the “Web Map Services” tab:
- Go back the Omeka administrative interface and find the item that you want to associate the map with (or just create a new item). Open up the edit form for the item.
-
Click the “Web Map Services” tab. Fill in the the top-level WMS address for the GeoServer installation (this always ends with
/wms, and might look something likelocalhost:8080/GeoServer/wms) and enter the list of comma-delimited layers that you want to be associated with the item. For example, if you have a workspace called “hotchkiss” with layers “chancellorsville” and “fredericksburg,” you could enter:hotchkiss:chancellorsville,hotchkiss:fredericksburg. -
Save the item
-
Use the map in a Neatline exhibit
The two methods both have the end result of filling in the two fields in the “Web Map Services” tab. The only difference is in whether the .tif file is uploaded through Omeka or directly into GeoServer.
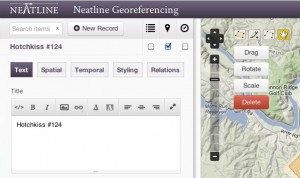
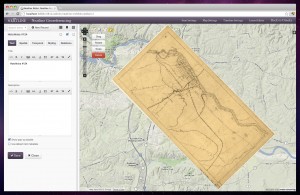
Once an item is linked to a web map service, Neatline automatically detects the map and loads it into an exhibit when the item is activated on the map. With the item queried into the editing environment for an exhibit, just check the middle of the three checkboxes next to the listing for the item in the content management panel:
…and the WMS layer will appear on the map:

