Drawing Geometry on the Map
At a glance
- The drawing controls under the “Map” tab make it possible to add vector annotations to the map.
- There are three basic types of geometry - points, lines, and polygons.
- The built-in tools are best suited for simple shapes that don’t require large numbers of points.
- Activate the different drawing modes by selecting the corresponding radio buttons.
- When you’re done drawing, switch back to the “Navigate” mode to avoid accidentally drawing more shapes.
Navigate
Select the “Navigate” radio button to enable the default panning interaction with the map - click and drag to move the map in one direction or another, and use the scroll wheel on your mouse to zoom in and out.
Tip: Think of Navigate as your “home base” - after sketching in new geometry with one of the drawing tools, it’s usually easiest to reactivate “Navigate” mode, which has the effect of turning off any of the drawing or modification tools. This means that you don’t accidentally add unwanted geometry the next time you click on the map.
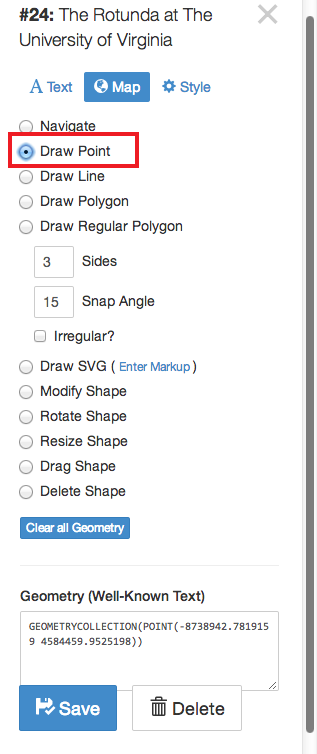
Draw Point
Use this control to lay down individual points on the map.
-
Select the “Draw Point” radio button, move the cursor to the location on the map where you want to place the point, and click down once to drop the point.
-
To add multiple points, just click multiple times in different places.
Important: Points are displayed as circles on the map, but, in the underlying data, they’re actually represented as dimensionless pairs of lat/lon coordinates. Since they’re infinitely small and have no measurable “size” that can be correlated to the scale of the map, the points will always stay the same size, regardless of the zoom level of the map (the size of the circles can be controlled by the “Point Radius” field in the “Style” tab).
Depending on the situation, this can be good or bad. For example, if you’re using points in conjunction with the “Point Image” feature to plot thumbnails of photographs onto the map, you might want the points to stay the same size at different zoom levels so that the preview images never become too big or too small. If you want a real geometric circle that changes size with the zoom level, use the “Draw Regular Polygon” tool.
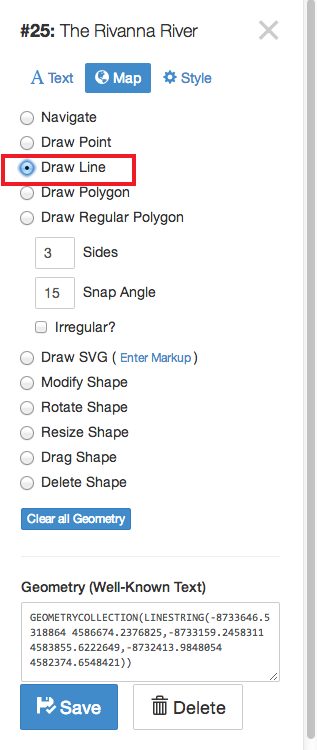
Draw Line
Just like the “Draw Point” radio button, except that the points are connected by a line. To draw a line:
-
Select the “Draw Line” tool, move your cursor to the place on the map where you want the line to start, and click down once. Now, when you move the mouse, a line will connect the cursor to the location of the first point.
-
Click again to lay a second point. Keep on clicking to add multiple points. You can also draw a smooth line that automatically follows the movement of the cursor. Hold down the Shift key and then click and drag on the map. This lays down a new point for each individual pixel movement registered by the browser.
-
When you’re ready to lay down the final point, move your cursor to the place where you want the line to end and double click. This “completes” the line.
Tip: This feature has the effect of creating extremely dense geometry, which is very difficult to maintain (eg, if you decide later on that you want to change the shape of the line, you would have to manually move hundreds or thousands of individual points). If you need smooth, curvy shapes, always see if you can use the “Draw SVG” feature, which makes it possible to import easily-maintained vector graphics created in programs like Adobe Illustrator and Inkscape.
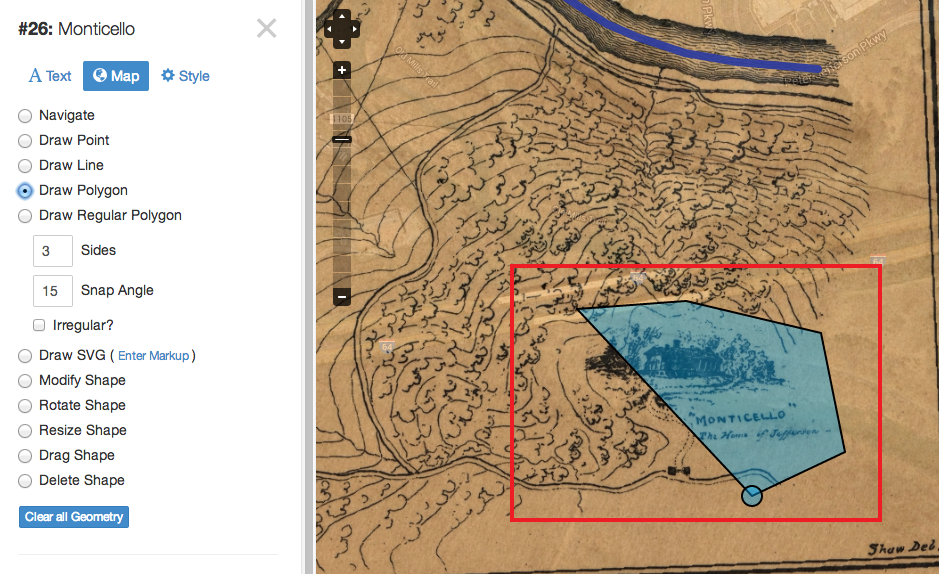
Draw Polygon
Just like “Draw Line,” except that the shape defined by the points is “closed” into a polygon as soon as you put down more than two points. To draw a polygon:
-
Select the “Draw Polygon” radio button, move your cursor to the place on the map where you want to place the starting “corner” of the polygon, and click down once.
-
Click again to lay a second point. Keep on clicking until to add multiple points. Like with the point tool, you can draw smooth shapes by holding down Shift, clicking down on the map, and dragging the cursor.
-
When you’re ready to lay down the final point, move your cursor to the place where you want the last corner of the shape and double click. This “closes” the polygon.
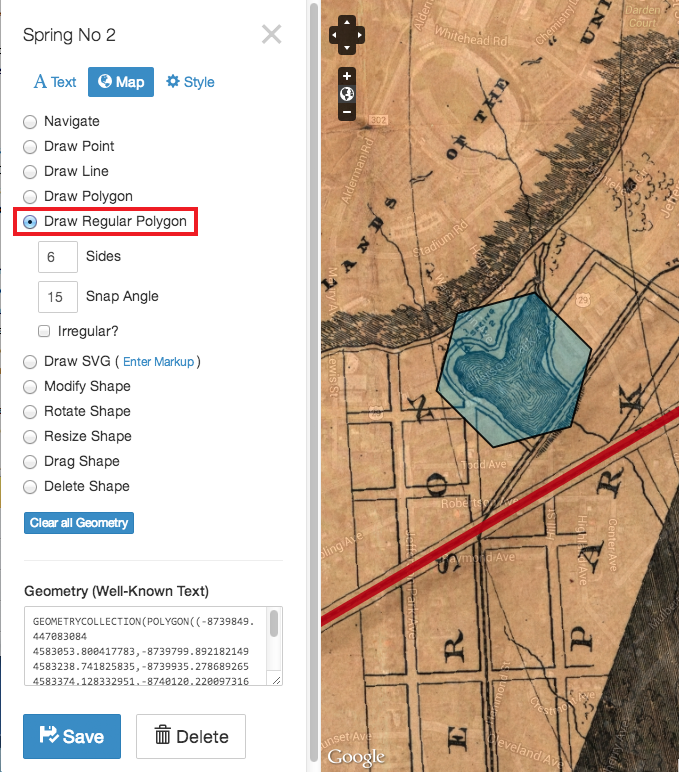
Draw Regular Polygon
“Draw Regular Polygon” creates closed shapes just like the regular “Draw Polygon” tools, but it doesn’t let you manually position the individual points - instead, it automatically creates a polygon with a given number of sides. This is useful if you want to create consistently-shaped geometric primitives (triangles, squares, circles, etc.), and it can also be a good way to sketch in basic components of more complex shapes:
-
Select the “Draw Polygon” radio button and move your cursor to the place on the map where you want to position the center of the polygon.
-
Click down and, while still holding down on the mouse button, move the cursor in any direction away from the center point. As you drag the mouse, a polygon will be dynamically rendered on the map with a radius equal to the distance between the cursor and the center point. Rotate the cursor around the center point to change the orientation of the polygon.
-
When the polygon is positioned correctly, release the mouse button to lock the shape in place.
There are a couple of configuration options for the regular polygon tool:
-
Sides: The number of sides on the polygon. For example,
3will draw triangles,4squares, etc. As this number gets higher, the resulting shape will smooth out into a circle/ellipse. This is a good way to create circular shapes with “real” diameters that will expand and shrink with the zoom level of the map (as opposed to the circles used to represent points, which are “dimensionless” and always stay the same size - see the “Draw Point” section). Don’t go overboard with the number of sides - in most cases, 30-50 sides is more than enough to create a smooth shape. -
Snap Angle: As you drag the cursor away from the center point, the rotation of the polygon will “snap” into a series of fixed angles. This makes it possible to create a series of shapes with the exact same orientation on the map (eg, a series of rectangles with sides that are all perfectly aligned with the cardinal directions). This field controls the size of the angle between each of the consecutive rotations.
For example, if you set a snap angle of 30 degrees, it will only be possible to orient the shape in a couple of different ways; as you decrease the angle, the rotation becomes more granular, and at 0 the snapping is completely disabled.
- Irregular: By default, all of the sides of the polygon are equal in length (eg, a 3-sided shape is always an equilateral triangle, a 4-sided shape is always a square, etc). Check this box to make it possible to create “skewed” shapes with sides of different lengths - rectangles instead of squares, ellipses instead of circles.
Tip: This setting can have strange interactions with certain “Snap Angle” values - if you need to create an irregular shape, it’s generally easiest to set the snap angle to 0, drag out the shape, and then rotate it as needed with the “Rotate Shape” tool.