Creating Records
At a glance
- Records can be created directly inside of a Neatline exhibit.
- Existing Neatline records can be individually linked to (and unlinked from) Omeka items at any point.
- Omeka items can be bulk-imported into Neatline exhibits.
Manually creating records inside of exhibits
The simplest way to add a new record is just to create one directly inside of the Neatline editor.
-
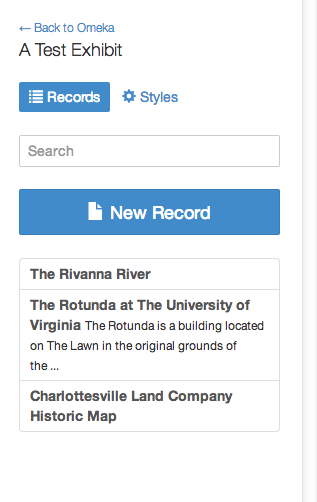
Open the editor for an exhibit by clicking on the exhibit’s title in the main browse view.
-
Click the “New Record” link just below the search bar.
This will open up an empty editing form for the new record. Important: Keep in mind that the record won’t actually be saved to the database until you click the “Save” button at the bottom of the form.
Connecting a Neatline record with an Omeka item
Once a record has been created in an exhibit, it can be “linked” back to an item in the Omeka collection:
-
Open the editing form for the record that you want to tie to an Omeka item (or click “New Record” if you want to start from scratch).
-
In the “Omeka ID” field, start typing the title (or any text that appears in any of the other elements) of the Omeka item that you want to associate the record with. As you type, a list of matching search results will autocomplete below the input.
-
Click on the name of the item that you want to link the record with. As soon as you click on the listing, the “Omeka ID” field will be populated with the item’s id, and the title will be inserted into the “Title” field.
-
Click the “Save” button at the bottom of the form. The “Body” field of the record will be populated by the compiled metadata output of the parent item (similar to the content that’s displayed on the default item “show” pages in Omeka).
Once the association is established, the Neatline record will update automatically whenever the Omeka item is changed. For example, if you changed the title of the record, or added a new file upload, the “Title” and “Body” fields would automatically reflect the new information when you view the Neatline exhibit.
Important: Once you’ve associated a record to an Omeka item, you can’t make custom changes to the “Title” or “Body” fields. For example, if you change the title to something else, and then saved the record, the new value would be overridden by the Dublin Core “Title” field on the item. This is a deliberate restriction - if you find yourself wanting to tweak the content of the record - but don’t want to change the elements directly on the parent item - it may be an indication that the record shouldn’t be associated with an item, and should just be an unaffilliated record in the exhibit.
That said, it’s quite possible that you might want to change the structure or layout of the compiled metadata output in the “Body” field. For example, imagine that you’re working with items that represent photographs - in the Neatline exhibit, you might want to hide some of the more nitty-gritty element texts on the items (eg, “Date” or “Published”), and just show the title, thumbnail, and description. To address this, Neatline makes it possible to completely customize the structure of the compiled “Body” fields at the level of the theme in the same way that you create a custom show.php template for the regular item pages. Head over to the “Theming Exhibits” guide for detailed instructions about how to do this.
Related: Bulk-importing Omeka items, Searching Records, Adding Text Content, Drawing Geometry