Image-based Exhibits
At a glance
- Exhibits can be built on top of any static, web-accessible image (.jpg, .png, etc).
- This makes it possible to use Neatline to create interactive editions of paintings, drawings, photographs, documents, and anything else that has some kind of two-dimensional, visual instantiation.
Creating an Image-based Exhibit
To create an exhibit using an image base layer, follow the instructions for Creating New Exhibits, using the following Exhibit Settings:
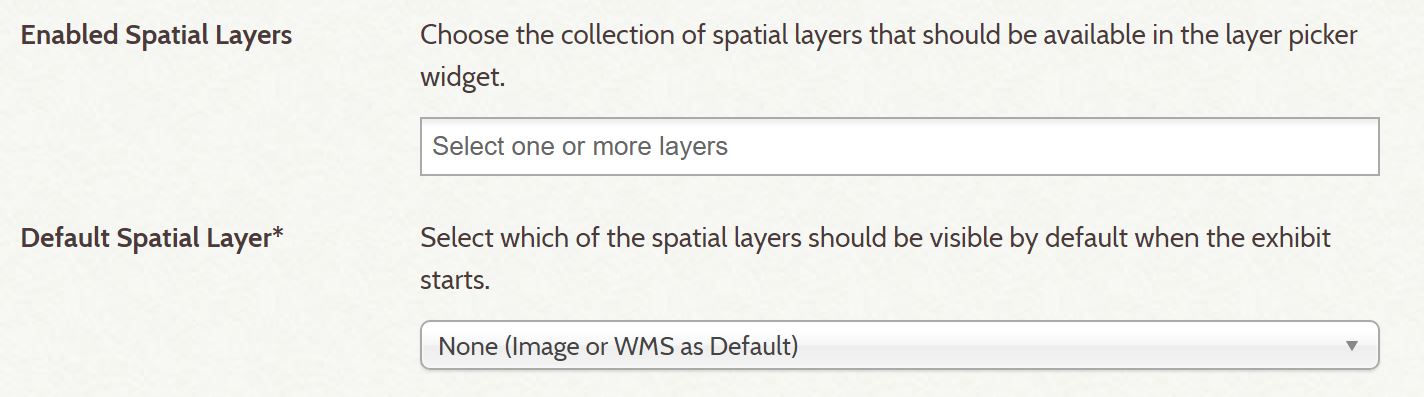
Spatial Layers
Leave the Enabled Spatial Layers selection empty, and select the option ‘None (Image or WMS as Deafult)’ for the Default Spatial Layer:
There are two methods of creating image-based exhibits, depending on your needs:
-
Using a regular, static image: This method is easy to set up and doesn’t require any additional server infrastructure. However, there’s a fundamental limitation - since the entire image has to be loaded in bulk into the in-browser application (as compared to the spatial layers, which are loaded dynamically depending on the focus and zoom of the map), the performance of the exhibit will get worse as the image gets larger. Things work well if you’re working with a more or less normally-sized image (up to around 2-3000 pixels in height/width), but after that things start to get unacceptably sluggish.
-
Creating a custom WMS layer: If you need to use a really high-resolution image, there’s an effective workaround that involes essentially tricking Neatline into thinking the image is a spatial layer - you can “faux-georeference” the static image (just assign it random, meaningless spatial coordinates), load it into Geoserver as a WMS layer, and then import it into an exhibit as the sole base layer, with no map underneath. The image will be presented just as if you were using a regular static file, but you’ll have all the scability that comes with a dedicated tile server.
Method 1: Using a Static Image
To use a static image background layer, your image must be web-accessible. If you need a place to host an image file, add it as an item within your Omeka collection. Enter your image url into the Image Layer field:

Provide a value for Zoom Levels. Consider the size of your static image file when determining zoom levels, as your image may appear pixelated if more zoom levels are provided than the image can handle. The default zoom level is 20.

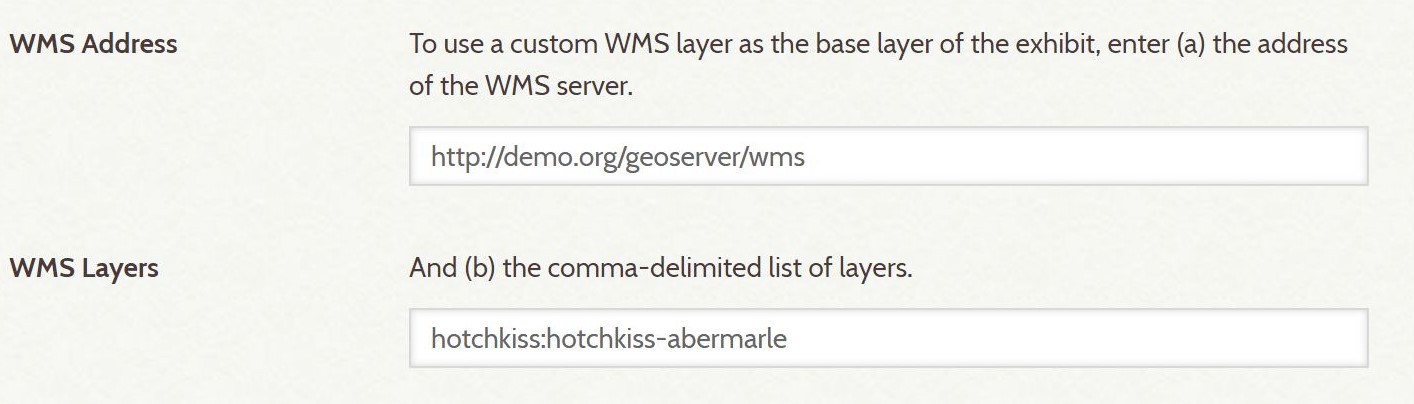
Method 2: Using WMS Layers
Load your “faux-georeferenced” static image into Geoserver as a WMS (Web Map Services) layer. In the Neatline Exhibit Settings, fill in the the top-level WMS address for the GeoServer installation (this always ends with /wms, and might look something like localhost:8080/GeoServer/wms). In the field for WMS Layers, enter the layer that you want assigned as the exhibit base layer:
Related: Creating New Exhibits, Editing Record Imagery, Editing Record Visibility, Installing Geoserver